
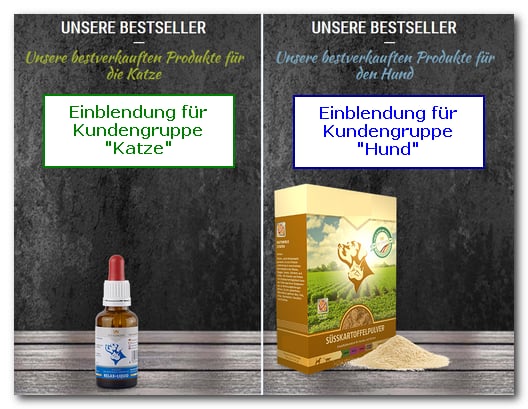
How personalization works
Using the example of a pet supplies shop for dogs and cats:
The same procedure also supports other personalizations, for example custom color schemes or a redirect to a fixed landing page, both in the current session and on later visits.
What the cookie contains
The shop stores any number of key-value pairs in a single cookie. It encrypts the content with AES-256 and then compresses it. So the cookie can neither be used to read nor to influence which target group a visitor is assigned to. The cookie name isws_<Shop>_<Sprache>_design_cookie.
Keys are compared case-insensitively.
Kundengruppe and kundengruppe are therefore the same key. If you set the same key again, the previous value is replaced.Prerequisites
Onsite personalization does not need to be activated by WEBSALE AG. However, two conditions must be met for the cookie to be written at all:- The customer has enabled cookies in their browser.
- Consent has been given for the service, if you use consent management.
Consent in consent management
As soon as you use the shop’s consent management in production, onsite personalization requires consent. The associated WEBSALE service is calledDesignCookie and must be assigned to a consent entry in the shop configuration.
If consent management is not active at all, this check is skipped and the cookie is always written. Please clarify with your data protection officer which information texts your customers need about the use of cookies.
Step 1: Define the validity period
The validity period of the cookie is 30 days by default. You define it in the shop configurationshop.config in the Basic section.
Without an entry or with the value
0, 30 days apply.Step 2: Create the displays as includes (optional)
You have two ways to deliver the target-group-specific content. Either you load separate include templates, or you store the content directly in the template and show and hide it with brackets. Step 4 shows both ways. For the include approach, create the templates now and save them in the template directorybenutzer/templates/translation. In the example, these are:
The structure of the file names is no coincidence. The shop later assembles the file name from a fixed prefix and the value of the cookie, following the pattern
incl_<Wert des Cookies>.htm. The file names therefore determine the values you assign in the next step: katze and hund.
Step 3: Set the cookie
On the pages that should identify a target group, add the following code. In the example, this is the landing page for cat owners.hund:
The shop additionally sends the design cookie itself as a
Set-Cookie header, using the value from DesignCookieDays. That is why var days in the script must have the same value. If the two do not match, the lifetime of the cookie depends on which of the two ways wrote it last.The
DC-CookieData_cookieHasChanged bracket only applies if something has actually changed in the cookie content. If you set the same key with the same value again, the script is not output. This is intentional and saves unnecessary write operations in the browser.Step 4: Deliver the content
Both ways depend on the same bracket.{DC-CookieData(kundengruppe)} applies if the key is present in the cookie; the negated form {!DC-CookieData(kundengruppe)} applies if it is missing. Within the bracket, ~DC-CookieData_touchKey(kundengruppe)~ remembers which key is currently meant. Only then does $DC-CookieData_lastValueTouched$ return its value.
Way A: Include technique
The value from the cookie is inserted into the file name. If the cookie contains the valuehund,
~WS-DynIncludeTpl(incl_hund.htm)~. In full, it looks like this:
Way B: Brackets directly in the template
Instead of loading include templates, you pass the value to a design parameter and use it to bracket the content directly in the template.<Index Kategorie Katze> and <Index Kategorie Hund> with the indexes of your categories.
Way B is suitable for manageable differences such as headings, banners or color schemes. As soon as entire page areas differ, way A becomes clearer, because each target group gets its own file and the main template stays lean.
Further tags for accessing the cookie
In addition to the tags used above, further tags are available that in some cases get you to your goal more quickly.Within the loop,
~DC-CookieData~ returns the key and ~DC-CookieData_get~ without parameters returns the associated value. This is the most convenient way to check in test mode what the cookie actually contains.Related topics
- Guide: Cookies
- Guide: Reuse: Includes
- Guide: Consent management