
This function must be activated for your shop by WEBSALE AG.
Services and tasks
Both services are located in the online service area.
The building blocks of a campaign
The second level is the reason the system is so powerful. A “shipping cost reduction” campaign can switch UPS costs and DHL costs at the same time, with different values. To do so, it gets two config entries, for example
ups-versandkosten and dhl-versandkosten.What you should know about campaigns
Guide: Configuration types
The WS-Campaign tag in two roles
The same tag works differently in two places.
In the configuration, there are two parameters and dollar signs as brackets; in the template, one parameter and the curly section brackets. If you mix up the notations, you do not get an error, you simply get no effect.
Creating a campaign
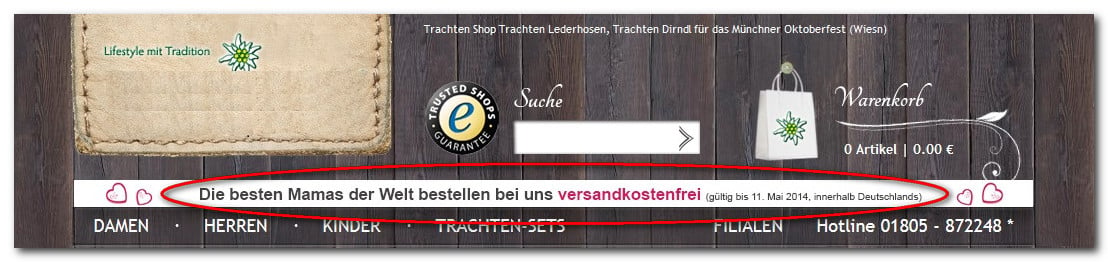
The running example is a campaignversandfrei that changes the shipping costs of a shipping provider and displays a banner.
Step 1: Prepare the affected configuration lines
In the Konfiguration service, open the shop configuration of the subshop in question and find the lines the campaign should change. Copy them into a separate editor window and create two versions: the previous values for the time without the campaign and the new values for the time with the campaign.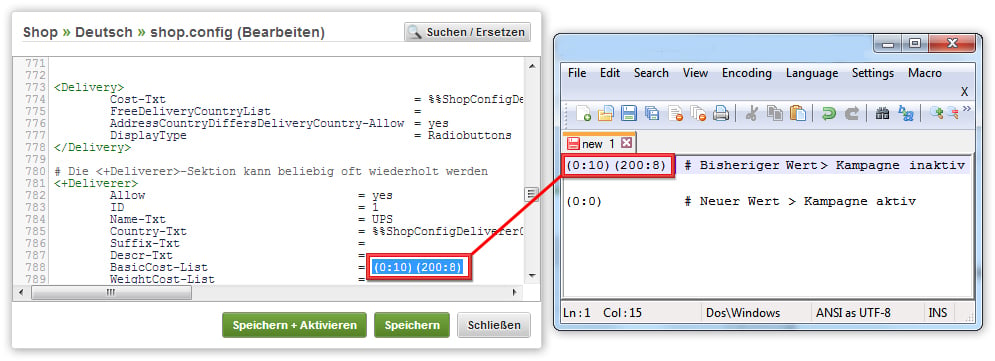
This preparation pays off because you can transfer both versions directly into the campaign config entry and you do not lose the original content.
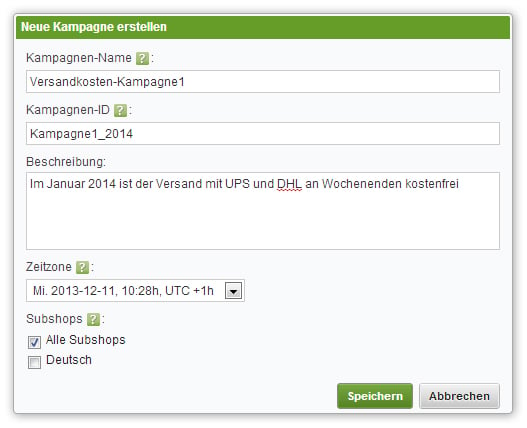
Step 2: Create the campaign
- Switch to the KampagnenManager tab.
- Move the mouse pointer over the Kampagnen title bar in the navigation area and click the document icon that appears.
- In the dialog window, enter a name and campaign ID and define the basic settings.
- Save. The campaign appears in the list in the navigation area.
Step 3: Create the config entries
Each place in the configuration that should be switched needs its own config entry.- Click the campaign in the list. Its definition appears on the right.
- In the title row of the Kampagnen-Config-Einträge section, click the document icon.
- Enter a name and config entry ID.
- Under Inhalt (aktiv), enter the version for the running campaign, and under Inhalt (inaktiv), the version for the rest of the time. The inactive content is optional.
- Save and create further entries as needed.
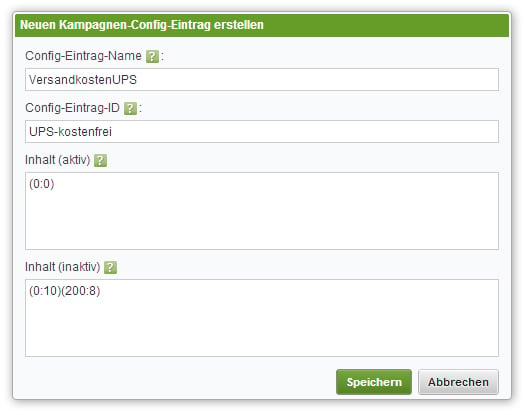
Related configuration lines, even an entire section, fit into a single config entry. So you do not need one entry per line, but one per place that is switched together.
Step 4: Insert the tag into the configuration
Open theshop.config of each assigned subshop, find the content in question and replace it with the tag.
Step 5: Create the area in the template
On every template you can set up an area that only appears during the campaign. This can be a sentence, a banner, a page section or a completely different page.The tag strictly requires a campaign ID as a parameter. Without a parameter, it returns nothing.
Defining and changing schedules
The campaign is now set up, but has no effect yet. Only a schedule switches it on.- In the online service area, select your shop ID and the KampagnenSteuerung service.
- Select the campaign on the left. Its definition appears on the right.
- In the title row of the Zeitplan section, click the document icon and choose a start and end date.
- Save. The period appears in the list of schedules.
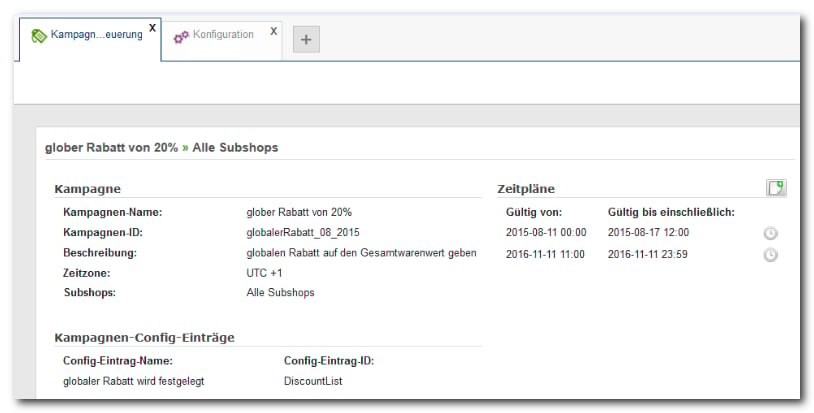
Any user with the appropriate rights can maintain schedules. This is exactly why KampagnenSteuerung is a separate service: the merchant controls their own promotions without having to touch the configuration.
Checking a campaign in advance
You can view a campaign before its schedule takes effect.- In the Konfiguration service, on the Konfigurationen tab, open the
shop.configof the desired subshop. - Click the test configuration icon at the top right of the title row.
- Select the campaigns to be tested, including several, and click Testkonfiguration erstellen.
- Call up the shop in test mode with the additional parameter.
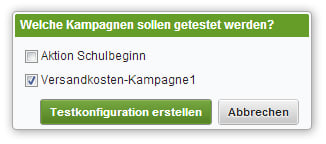
Switching the campaign test mode on and off causes the shop to reload the configuration, once the test version and once the normal one. This is why the changed configuration values take effect immediately.
Checking which campaigns are currently running
In the campaign list, there is a clock icon after each campaign. Green means the campaign is currently active according to its schedule; grayed out means inactive. You will find the list both in KampagnenSteuerung and in KampagnenManager.The shop briefly caches the state of a campaign instead of determining it anew on every page request. A schedule change you have just made is therefore not reflected in the shop at the very same moment.
Dismantling a campaign
Related topics
- Guide: Configuration types
- Guide: Switching the shop’s test modes on/off
- Reference: WS-Campaign()