
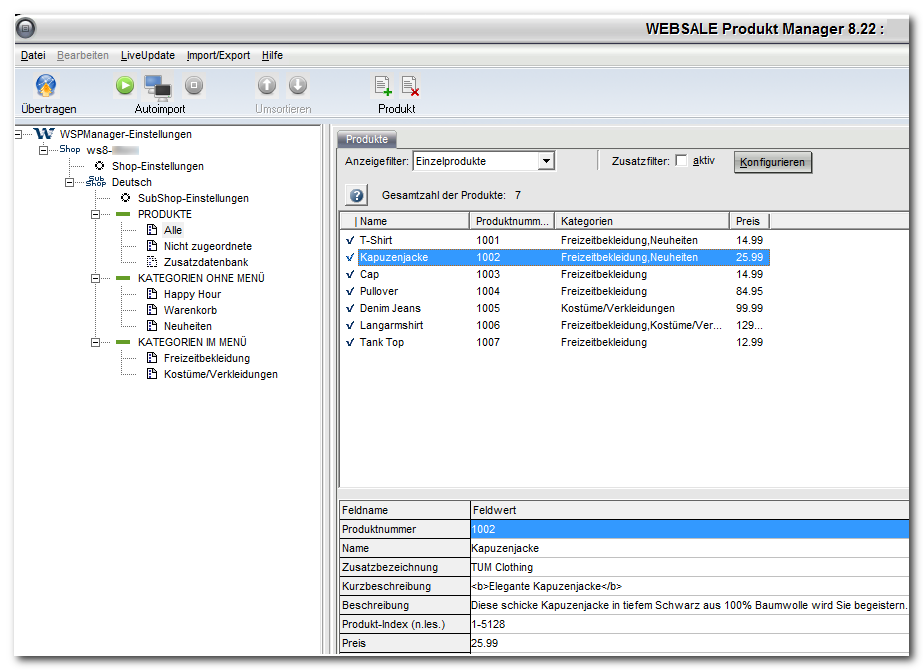
Opening the program
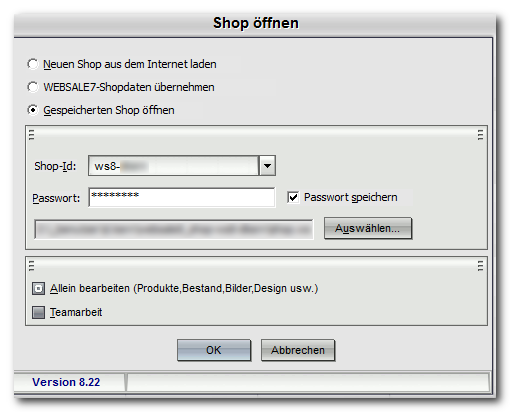
- After starting the program, a window opens in which you select the shop ID of the desired shop and enter the password.
- Confirm with “OK” and the shop data is opened for editing.
When you start the program for the first time, you must select “Load new shop from the internet”. In the following dialog windows, enter your shop ID and your password — you can find both in the provisioning documents — and select the desired local directory in which the shop should be saved. The requested shop data is then downloaded to your PC.
Creating categories
Only a few clicks are needed to create categories for structuring the products in your shop: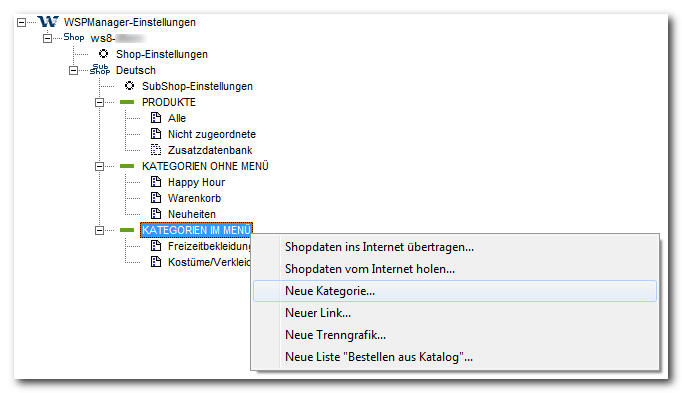
- In the directory on the left side of the software interface, right-click on “Categories in the menu” and select “New category…”.
- An input field opens in which you enter the name of the category, for example “Leisurewear”.
- Confirm with “Create”.
Creating products
You create products as follows: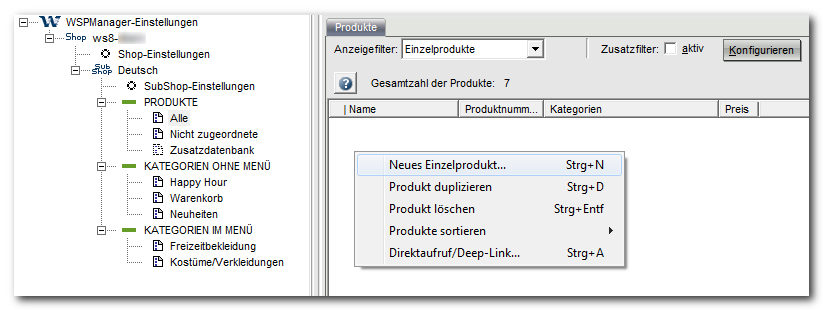
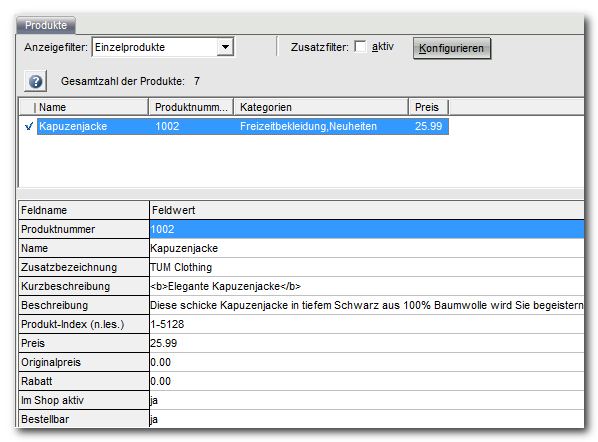
- In the directory on the left side of the software interface, click “All” under “PRODUCTS”. On the top right an initially empty list appears, and below it a table with various product attributes.
- In the empty area at the top, right-click and select “New single product…”.
- An input field opens in which you enter the name of the product, for example “Hooded jacket”. Confirm with “Create”.
- Now enter the desired product information in the respective field of the table below.
Adding product images
The WEBSALE shop supports four image sizes per product. The two most important are the normal-sized images (field name “Image”) and the small images (field name “Media image small (thumbnail)”). Thumbnails are typically used when a list of products is shown in the shop, and normal-sized images when only a single product is visible. In addition, extra small images (“Media image mini”) and large images are supported.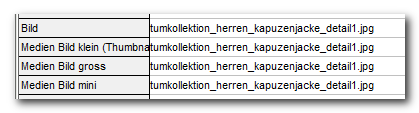
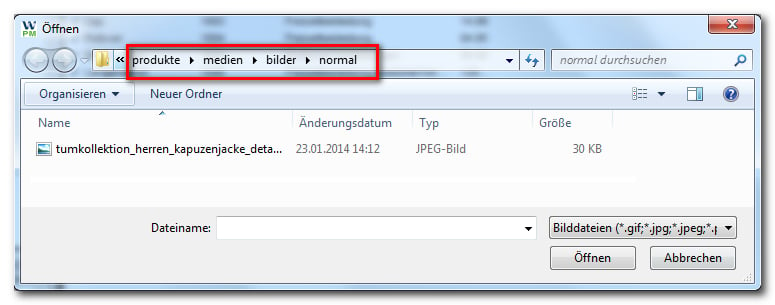
produkte\medien\bilder\normal\. Thumbnails would have to be saved in the subdirectory klein, mini images in the subdirectory mini, and large images in the subdirectory gross.
In summary:
- Save the product images in the fixed, predefined subdirectories of the shop.
- On the corresponding product, click into the product data field “Image” and select the desired image — here the normal-sized one.
- Proceed accordingly for the other desired image sizes.
Adding further product information
Additional fields required for product information — for example washing instructions — can be created as follows: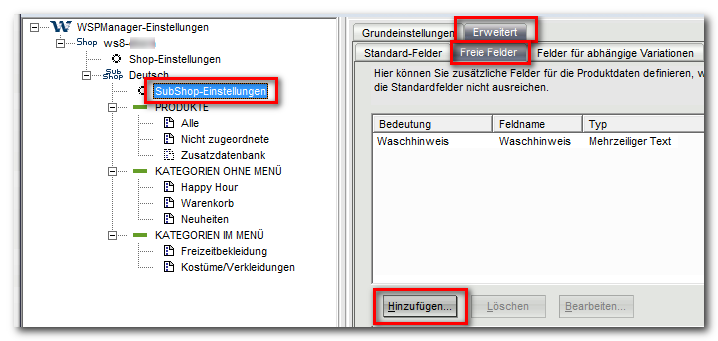
- On the left, select “Subshop settings”.
- On the right, click the “Advanced” tab.
- Select “Free fields”.
- Click “Add” and create the desired product data field in the window that appears.
Assigning products to a category
You assign the created products to one or more categories:- Under “Products”, click “All” or “Unassigned”. You are now in the product view.
- Now drag the product via drag and drop — that is, with the mouse button pressed — to the left into the desired category.
Transferring the data
To make the products and categories you created visible in the online shop, the data must be transferred: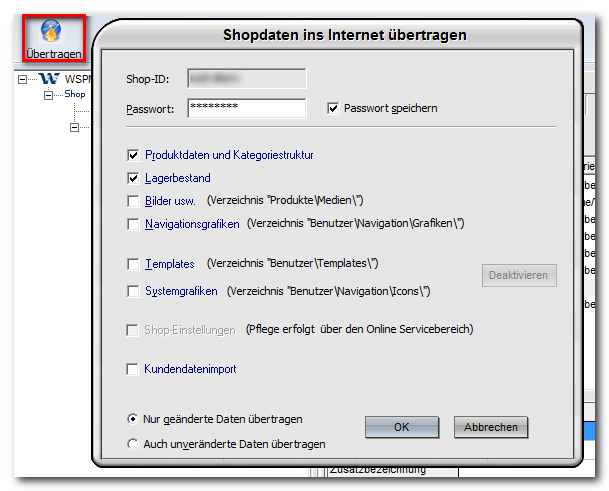
- To do this, click “Transfer” at the top left.
- A window opens in which you can select which shop data should be transferred to the internet.
- Confirm with “OK”.