
Include the product menu in all shop templates that are to provide access to the product catalog. A template without this construct shows no catalog navigation.
Step 1: Preload the menu tree
Without a preloaded menu tree, all sections and loops remain empty. Two tags are available for this, which correspond to the tags of the automatically generated menu and have the same parameters.
Via the parameters, you define, among other things, the start level and the end level. The meaning of the individual parameters is described for the automatically generated product menu and applies here unchanged.
Guide: Automatically generated product menu
Reference: WS-LoadProductMenu()
If you set the fifth parameter to
yes and thus use the MouseOver function, you need the WEBSALE JavaScript library from version 1.8.1 onwards. It must be included in the <head> of every template that contains this product menu.Step 2: Choose an output method
There are two methods for the output. They differ above all in the maintenance effort when the product catalog grows.
Both methods reach a depth of up to ten levels, that is, the main menu and up to nine submenu levels. How many of them actually appear is decided by the parameters of the load tag.
Understanding the status classes
In all following examples, the same construct appears in theclass attribute:
level1, yourself. The suffix is provided by exactly one of the three sections, depending on which state the navigation item is currently in. The result is therefore level1_opened, level1_closed, or level1_selected. You then design exactly these classes in your styles file.
Method 1: Output with PM-DataComplete
This method is the lowest-maintenance one. One section and one loop are enough to output all existing and all future menu levels with all navigation items. When the catalog grows by a level, you do not have to touch the template, provided the parameter values of the load tag cover the new level.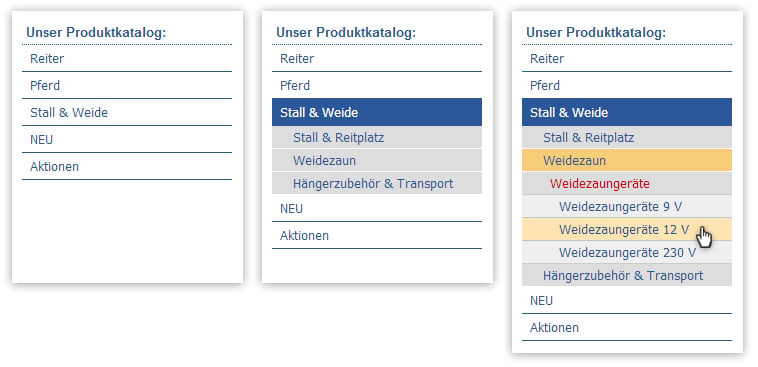
PM-DataLevel(n) and output your own markup per level.
Complete example
The following example outputs four levels each with its own styling. The load tag initially displays only the topmost level directly.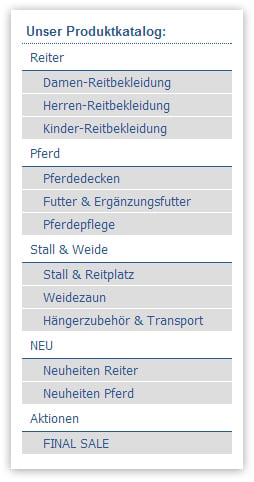
Method 2: Output with PM-DataLevel1 through PM-DataLevel10
With this method, you create a separate section for each level and nest them inside each other. The advantage is full control over the generated HTML, because the nesting of your sections matches the nesting of the menu. The disadvantage is the maintenance effort: if a category level is added, you have to add the corresponding section together with its loop. Each level consists of two nested markers. The outer section{PM-DataLevelN} checks whether there are any navigation items on this level at all. The inner loop {@PM-DataLevelN} then iterates over all existing and visible items of this level.
Complete example
The following example generates the same menu structure as the example for method 1, this time via four nested level sections.Styles for the examples
The following styles apply to both complete examples because both generate the same class names. This is no coincidence, but the reason why you can switch output methods without touching your stylesheet.Displaying two levels directly
If the main categories and their direct subcategories are to be visible from the start, change only the third parameter of the load tag to2. Neither the source code nor the styles need to be changed, and this applies to both output methods alike.
Submenu based on an index value
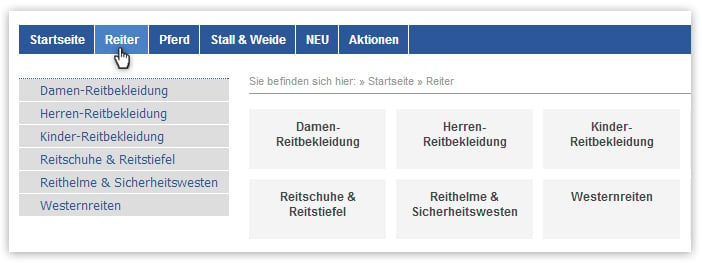
If your main menu is horizontal at the top of the page, load the vertical submenu withWS-LoadProductMenuIndex(). The value $_current_$ as the first parameter ensures that only the direct subcategories of the most recently selected category are used. Since the menu therefore already starts at the subcategories, the third parameter is 1.
The output itself is no different. You use the same sections and loops as above, only in a separate container.
Using category information in the product menu
Within the product menu, CAT tags are not allowed. A construction like the following therefore does not work:@PM-DataComplete and in @PM-DataLevel1 to @PM-DataLevel10.
- Reference: PM-Descr
- Reference: PM-FreeField1…20
- Reference: PM-OverviewImg